Welcome, fellow garden enthusiasts! Let’s go over some tips for growing pumpkins!
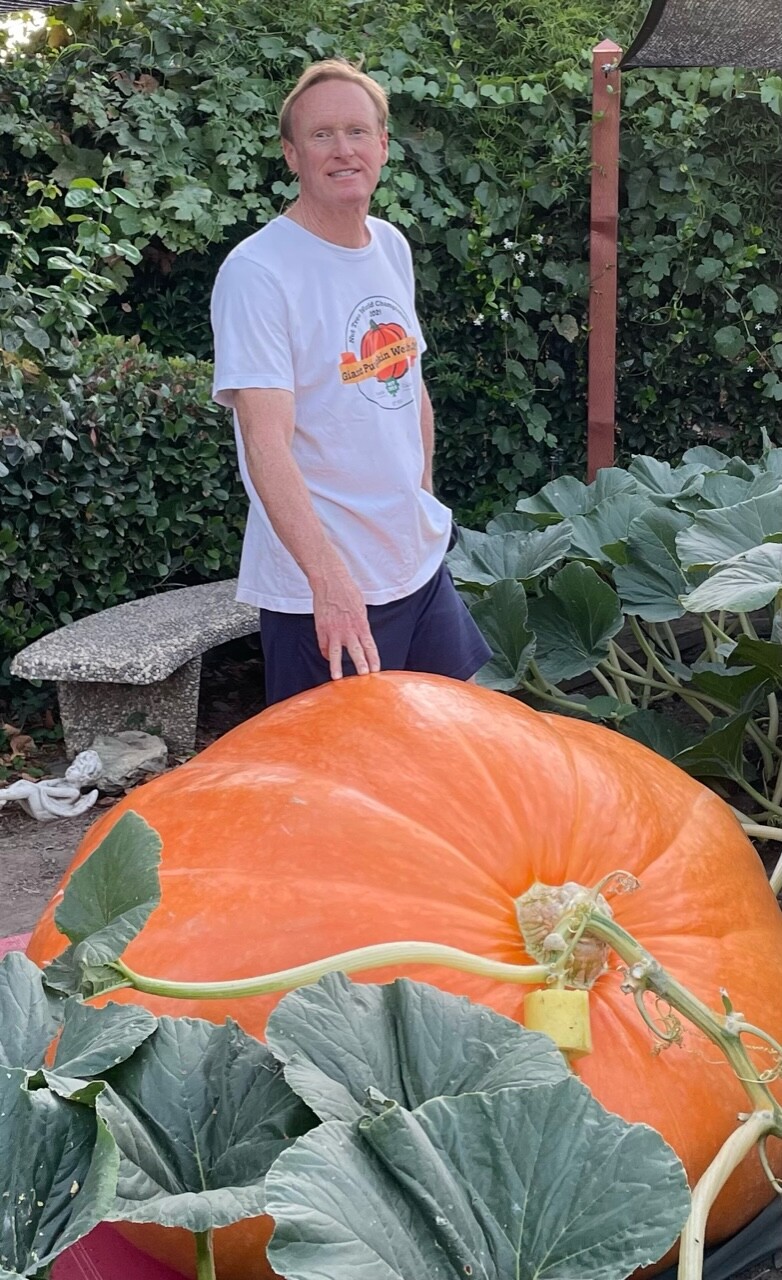
Today, we’re diving deep into the world of pumpkin plant cultivation, unraveling the mysteries, and sharing the keys to growing a thriving pumpkin plant right in your own backyard. My focus is on Atlantic Giant Pumpkins; however, the strategies can be used for any pumpkin. Imagine the joy of plucking a perfectly ripe pumpkin from your garden, destined for carving, baking, or simply adorning your doorstep.
Many of the tips and techniques in this blog are taken from my book, Backyard Big: Growing Atlantic Giant Pumpkins in Your Backyard. In order to grow a pumpkin, you need to grow a healthy pumpkin plant. Since it is the right time of the year to get that patch prepped, I will focus on preparation work.
Choosing the Right Variety
The first step in growing a thriving pumpkin plant is selecting the right variety for your space and preferences. Whether you opt for the classic Jack-O’-Lantern variety or a smaller pie pumpkin, make sure to choose a cultivar that suits your climate and garden size. Research different varieties to find the perfect fit for your pumpkin dreams.
Get the Right Seed
The first step in growing a giant pumpkin is to choose the right seed. There are many different seed types of Atlantic Giant Pumpkins. If you desire a bright orange Atlantic Giant Pumpkin, you will want to choose a pumpkin seed that came from a bright orange giant.
Conversely, if you desire to grow giant pumpkins and are ambivalent to color, you can choose a pumpkin seed that came from a very large Atlantic Giant Pumpkin that is light orange. You should also consider the size of the pumpkin that you want to grow when choosing a variety.
Prepping the Soil
A pumpkin plant thrives in well-draining soil rich in organic matter. Prepare your garden bed by amending the soil with compost or well-rotted manure to provide essential nutrients. Ensure the soil pH is within the ideal range of 6.0 to 6.8, creating the perfect foundation for your pumpkin plant’s growth.
Major Components
The table below shows the major components of soil. Each component is broken down into categories and items (if applicable). My review of soil components is structured in the table below. Soil is composed of four components: approximately 45% inorganic matter, 5% organic matter, 20%-30% water, and 20%-30% air.
Inorganic matter
Soil is made up of rock, sand, silt, and clay. Of course, there are boulders and large rocks but these are not common in garden soil. Soil is classified by the different sizes of particles, and the proportion of those sizes. The primary particles are sand, silt and clay. Sand particles are classified between 2.00 mm and 0.05 mm. Silt is anything between 0.05 mm and 0.002 mm and clay is less than 0.002 mm. The proportion of these three elements will determine the type of soil you have.
If you have too much of any one you’re gonna have problems, but there is a way to mitigate the inadequacies. You can do some simple tests at home to estimate how much of the different three particles you have. Alternatively, you can send soil samples to labs to test. I routinely test my soil every year to get an idea of how things are looking on my giant pumpkin growing adventure.

Last year my soil was classified as clay loam which in my opinion is very suitable. The ideal soil is approximately 40% sand, 40% silt, and 20% clay. When you have an ideal mixture like this, it is termed “loam”. Loam has efficient water drainage and allows air to enter the soil, yet it also holds moisture well.
When there is too much sand, the spaces between the particles are too large and water flows through too quickly as a result. When this happens, it is difficult to keep your soil hydrated and absorb nutrients. If there is too much clay and not enough sand, for example, the opposite happens. Water will not pass through the soil enough and over-saturate it. Less oxygen is present and thus less microbial life. Consequently, fewer nutrients can be absorbed by the roots in this case.
Macronutrients and Micronutrients
Other inorganic matter in soil includes macronutrients and micronutrients. These nutrients exist in healthy soil and are used by your plants if available. It can be necessary to augment your soil with macro- and micronutrients to maintain a high intensity growing environment.
The macronutrients you most commonly hear about are nitrogen (N), phosphorus (P), and potassium (K), and they are required for plant growth. These are primary macronutrients. Fertilizer you purchase will come marked as the percentage of each of these key three ingredients.
Nitrogen is essential for growth as it is involved in energy metabolism and protein synthesis. Plants can absorb nitrogen through their roots as nitrate or even on their leaves and stems. A helpful example of what nitrogen will do is when you fertilize your lawn it will green up and grow faster.
Phosphorus supports root growth and energy transport. You need healthy roots to absorb nutrients and phosphorus to develop and grow. Potassium increases photosynthesis capacity, strengthens cell tissue, and helps absorb nitrates.
Secondary macronutrients include calcium, magnesium and sulfur and these too are needed for plant growth, however, not in large quantities like primary macronutrients. Healthy fertile soil will have these nutrients available for root absorption.
These macronutrients can be depleted over time with heavy planting and become less available if your soil is not balanced. While it is easy to find primary macronutrient fertilizers, secondary macronutrient fertilizers are less common.
Some plants are very sensitive to primary macronutrients and absolutely need them for healthy development. For example, calcium deficiencies can cause blossom-end rot in tomatoes and prevent pumpkins from developing. If you notice problems with your vegetables, it could be due to secondary macronutrient problems.
Additional Micros
Additional micronutrients include Boron, Zinc, Iron, Manganese, Copper, Molybdenum, and Chlorine. Again, these nutrients are present in your soil and are part of a fertile loam. If you maintain a healthy amount of organic matter, you are likely to be well-stocked with micronutrients.
Once your soil is prepped, it’s time to sow the seeds. Plant pumpkin seeds directly in the garden after the last frost, ensuring a minimum soil temperature of 60°F (15°C). Create small mounds to promote drainage and plant 2-3 seeds per mound, spacing them according to the specific requirements of your chosen pumpkin variety.
Organic Matter
Detritus is composed of dead plants and animals like fallen leaves, manure, and leaf litter and they contribute positively to a pumpkin plant. This term describes all of this valuable stuff found in your soil. Much of the organic matter in soil comes from plant tissue at various stages of decomposition. This decomposed matter is either transformed into usable things such as soil nutrients in the form of humus, or used as food for other organisms.
Plant tissue releases nutrients into the soil in a way that plants can use. Think of a forest floor with decades of leaves and branches built up. Mulch is extremely helpful in building up soil organic matter as you add detritus to soil starved of this substance – because we don’t garden on a forest floor. By providing mulch, you add valuable organic matter to your soil. You can’t see it, but it happens!
Large animals in your soil such as earthworms, moles, gophers, snakes, and insects all play a role in soil health. There are millions of insects that spend their entire lives in the soil. Earthworms, sowbugs, mites, centipedes, millipedes and spiders live in the soil. Soil organisms play a critical role in decomposing organic materials and preparing the soil for plant growth.
Watering and Sunlight
It takes a lot of water to grow a pumpkin plant, so you will need to water it regularly. It is best to water pumpkins early in the morning so that the leaves have time to dry off before nightfall. If you live in an area with high humidity, you may need to water your pumpkins less frequently.
One way to determine if your pumpkin plants need water is to check the soil around them. The soil should be moist but not soggy. If it feels dry several inches below the surface, it is time to water.
Sunlight
A pumpkin plant is sun-seeking marvels that thrive in abundant sunlight. These plants demand a generous dose of sunshine to fuel their robust growth and development. Ideally, pumpkin patches should be situated in locations that receive a minimum of 6 to 8 hours of direct sunlight each day. The sun’s energy is crucial for photosynthesis, the process by which plants convert light into the energy needed for healthy foliage, blossoms, and, most importantly, the development of iconic orange orbs.
Providing your pumpkin plants with ample sunlight not only ensures sturdy vines and vibrant leaves but also contributes significantly to the overall success of your harvest, resulting in pumpkins that are not only visually striking but also rich in flavor and texture. It will also help you get a giant if that is what you are after.
Pumpkin Plant Care
As your pumpkin plant begins to sprawl, consider providing support for the developing fruit. Gently lift the growing pumpkins off the ground using a bed of straw or a wooden board to prevent rot and discourage pests. This simple measure can make a significant difference in the overall health of your pumpkin crop.
If you are growing a giant pumpkin, you might go to extremes in this regard. Giant pumpkin growers often grow their giants on pallets, sand, and special fabric to prevent rot. They also cover them to keep the sun away!
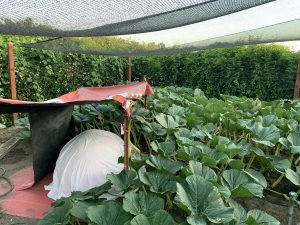
Shade Cloth for Giants
Shade cloth can be used to keep intense heat off of your pumpkin plant. Shade cloth is categorized by the fabric density. Vegetables typically need shade cloth between 30% and 60%. This means that between 30% and 60% of the sun’s light shines through the fabric.
There are ongoing discussions about the best type of shade cloth on bigpumpkins.com. The prevailing thought seems to be 30% or 40%. You can find shade cloth just about anywhere, however it can be difficult to determine the density. For example, Home Depot and Lowes both have shade cloth, however, it appears higher density.
The cost of a custom shade cloth can be high. My patch, which is barely 700 square feet required an odd-shaped cloth costing nearly $300. I wish I had a rectangular shaped area but it is not the case. I wrote a blog about growing pumpkins in the heat here.
Fending off Pests and Diseases
To effectively control pests and diseases in pumpkin plant cultivation, a holistic approach is recommended. Start by implementing preventive measures such as crop rotation and companion planting to disrupt pest life cycles and deter harmful insects. Maintain healthy soil through proper drainage and fertility, and ensure adequate spacing to promote air circulation, reducing the risk of fungal diseases.
Mulching around the base of plants can suppress weeds and prevent certain diseases, while watering at the base in the morning helps foliage dry quickly, minimizing fungal growth. Choose disease-resistant pumpkin varieties and regularly inspect plants for early detection of issues. Encourage natural predators like ladybugs and use natural solutions like neem oil for pest control. Insecticidal soap can tackle soft-bodied pests, while copper-based fungicides and baking soda sprays help combat fungal diseases.
Employ physical barriers like crop covers and traps for specific pests, and promptly remove infected plants to prevent disease spread. Explore organic pest control options like beneficial nematodes. Always follow instructions on any treatments used, and consult local experts for region-specific advice, fostering an integrated pest management strategy for sustainable pumpkin cultivation.
Harvesting the Fruits of Your Labor
As the days pass and your pumpkins ripen, the excitement builds. Harvest your pumpkins when the skin hardens and turns a deep, consistent color. Use sharp shears to cut the stem, leaving a few inches attached to the fruit. Allow your pumpkins to cure in a cool, dry place for about a week before bringing them indoors.
How to Move a Giant
If you grow a giant and intend to move it from your patch to enter it in a contest or to display it somewhere, you will have to make plans for the transport. Your methods mostly depend on the size of your giant.
Lifting Tarp
If your pumpkin is of manageable size, you can move it with a pumpkin moving tarp. I moved an 800-pounder one year with a special tarp and 10 friends. It certainly wasn’t easy but it is possible.
Pallets and Pallet Jack
When your pumpkin starts approaching 1,000 pounds, it is recommended to use mechanical means to move it. The pumpkin can carefully be tilted up and then laid on a pallet. Not this still takes at least five or size strong friends.
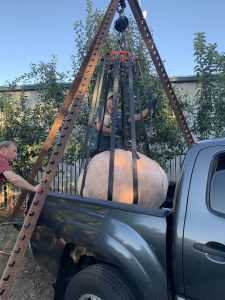
Lifting Tripod
This is your best bet for gargantuan beasts. Using a chain hoist and a tripod with a specialized lifting ring is a safe and efficient method. I usually move 1,000+ pounders with this method. I only need one other person.
Conclusion
Don’t stop here. Get some books and keep searching! Check out Backyard Big: Growing Atlantic Giant Pumpkins in Your Backyard, available on Amazon and Barnes & Noble. My garden blog is ready to feed you more information. Also, check out my book Backyard Big: Growing Food in Your Backyard, where I cover pumpkin and other fruit and vegetables.
Growing a thriving pumpkin plant is a rewarding adventure that connects us to the cycles of nature. With a bit of knowledge, care, and patience, you’ll soon be reaping the harvest of your efforts. So, roll up your sleeves, get your hands dirty, and watch as your pumpkin patch transforms into a flourishing haven of autumn delight. Happy gardening!